“Where is this field being used?” I bet you’ve asked yourself that question quite a bit! While it’s easy enough to determine if a field is on the page layout, or visible to users, it is not as easy to identify workflows, reports or Apex code where the field is being used. And that’s a bad thing.
While it would be nice to have a declarative option built into Salesforce for this type of reporting, the Force.com IDE offers this reporting ability today. Yet, many Admins stray away from using it because it seems too complex. Well, I’m here to tell you that it’s not as difficult as you would imagine!
What is Eclipse & the Force.com IDE?
Eclipse is a developer tool used by all types of developers across the world (not just Salesforce). Think of Eclipse as a shell with some built-in functionality to execute actions, search and write code and the like. Depending on what platform you’re building in, an IDE is installed to provide additional, platform specific functions.
That’s where the Force.com IDE comes in. Once Eclipse is installed, we need to install the Salesforce developed Force.com IDE to do anything with Salesforce metadata.
Now, I’m no expert; this is a layman’s definition so if any developers reading this want to provide a better explanation, please do so!
Installing the Force.com IDE
First thing’s first – we need to install Eclipse. Click here to access the Eclipse software. The current version as of this writing is Eclipse Neon.
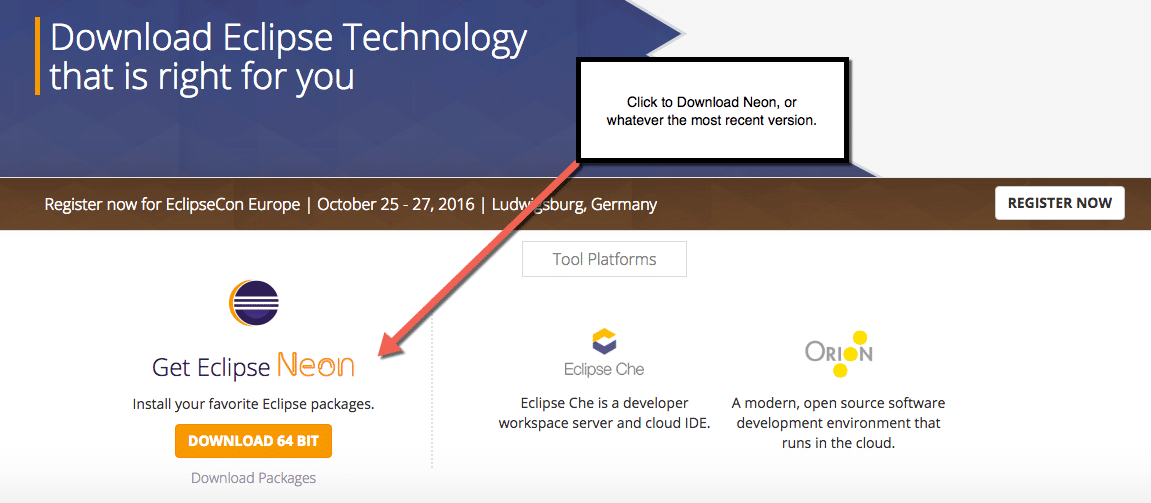
Follow the onscreen prompts to install Eclipse on your computer.
Once Eclipse is installed, it’s time to install the Force.com IDE. Again, these instructions are pretty straightforward and can be found on the Salesforce Developers site.
Creating a Force.com Project
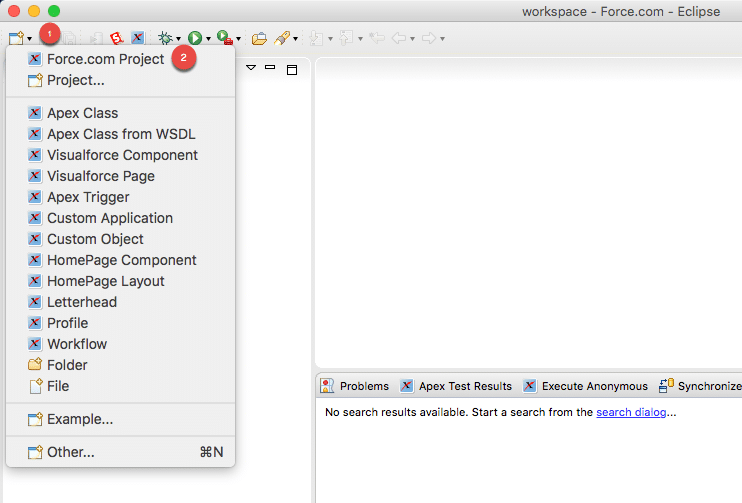
Now that the Force.com IDE is installed into Eclipse, it’s time to create a Force.com Project. The project will contain metadata elements that, in our example, we want to query. We’ll use the very easy wizard-like series of screens to create a project.
First, click the down arrow next to the New icon and then select Force.com Project.
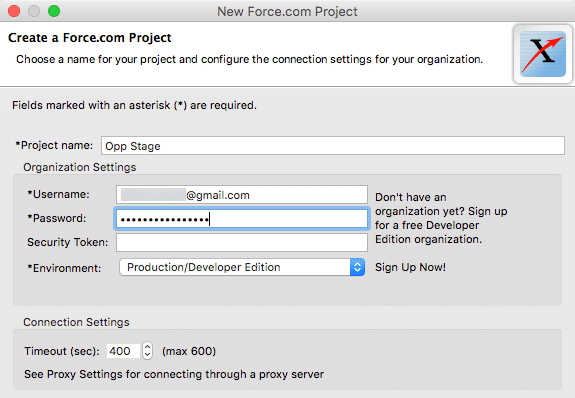
Next, provide your Login Credentials to the Salesforce Org you want to query and click Next.
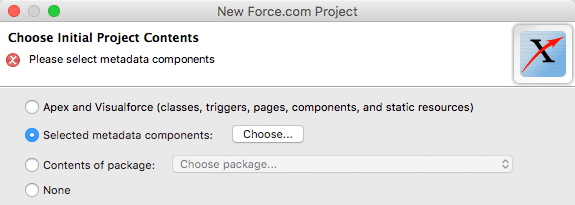
Depending on the size of the org, it’s a good idea to break up the metadata elements into chunks to reduce processing time. In this case, I know that the database is very large so I want to limit the metadata components to just a few. Click Select metadata components: then click Choose…
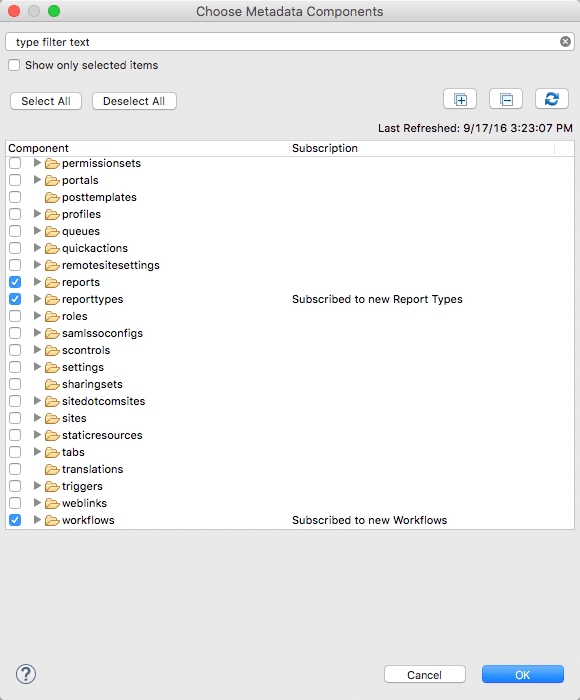
Next, select the metadata components that you want to query. Today, I’m interested in finding which reports, report types, email templates and workflow rules the field is used so I’ll select those metadata components. Remember, less is more here – especially for large databases!
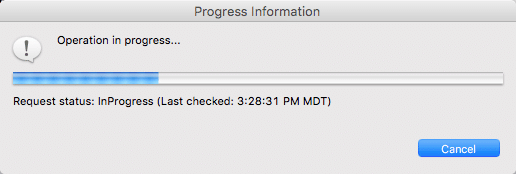
Depending on how large your dataset of the components selected, you’ll get this screen. Don’t panic. It can take several minutes to pull everything together. Take this time to get a refill on coffee, or do some deep breathing!
Confirm the metadata components and click Finish! You’ve successfully created a Force.com Project and you’re ready to start searching your metadata!

Searching The Metadata
Eclipse has now pulled all of the metadata down and is now searchable in the Force.com IDE. This is where the fun really begins!
After the Force.com Project is created, you’ll be redirected back to the Eclipse Workspace. This is where we’ll perform the analysis. In this example, my project name is called Opp Stage because I want to see where the Opportunity Stage field is being used in the metadata components I pulled down.
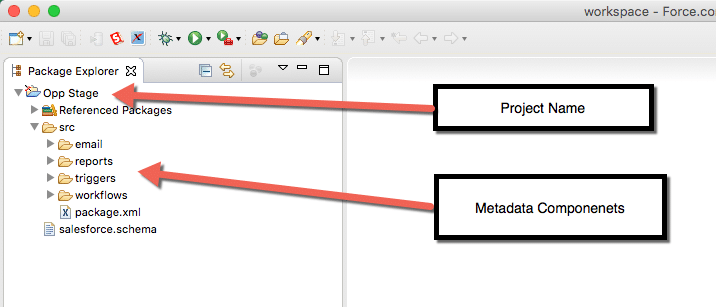
Notice that I selected email, reports, triggers, and workflows so these are the components available to me to query against. I’m going to start my query by clicking on the src folder. This will query all of my metadata components and return results. However, if you have a large number of reports, it’s probably better to select the reports folder to perform the search.
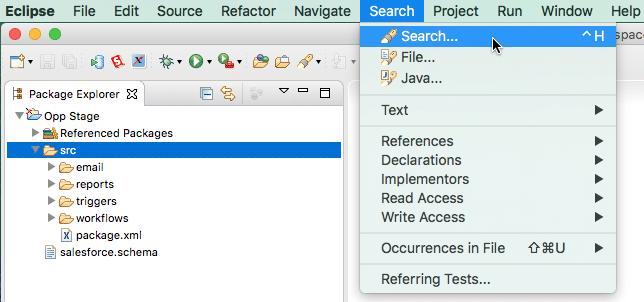
In the toolbar, click Search then Search again to open the search tool.
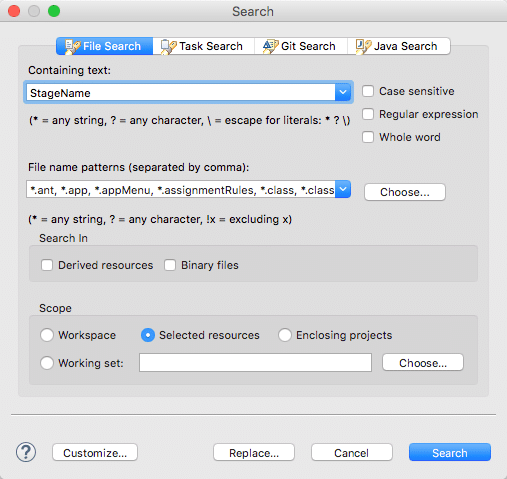
For this specific search, we’re looking at a field which means we’ll want to use the field’s API name. In this case, the standard Stage field on the Opportunity record has an API name of StageName so that’s what we’ll enter into the search box. Keep in mind that custom fields will end in a double underscore c (i.e. Custom_Field__c).
In the File name patterns picklist, choose everything. We want to produce the broadest search possible. Once you’re ready, click Search.
Once the query generates, use the bottom panel of the Workspace to explore the results!
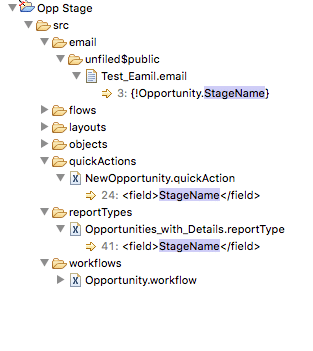 Here we see that StageName can be found in several locations in my org – specifically in an email called Test Email, in a Report Type called Opportunities with Details and in a workflow rule. Double clicking on any of these results will provide additional detail as to how it’s used.
If the field is used as a report filter, you’ll be able to identify that here which will help you to identify which reports need to be updated.
So, what field are you itching to practice with?

Leave a comment