Implementing State and Country Picklists Part 2

In Implementing State and Country Picklists Part 1, we looked at the setup process which should take place prior to activating the picklist functionality. Part 1 outlines some thoughts on how to evaluate your org to ensure that all bases are covered including how the change will impact users and how to minimize the impact. With the background work completed, this post will work towards the implementation of the functionality. Before proceeding further, be sure to download the official implementation guide by clicking here.
To access the configuration area, click Setup | Data Management | State and Country Picklists.
Salesforce has outlined the appropriate order of the implementation on this page. It is recommended that you follow this order to ensure everything runs smoothly. Take your time while implementing the feature so that it is done right the first time.
Configure Your Picklists
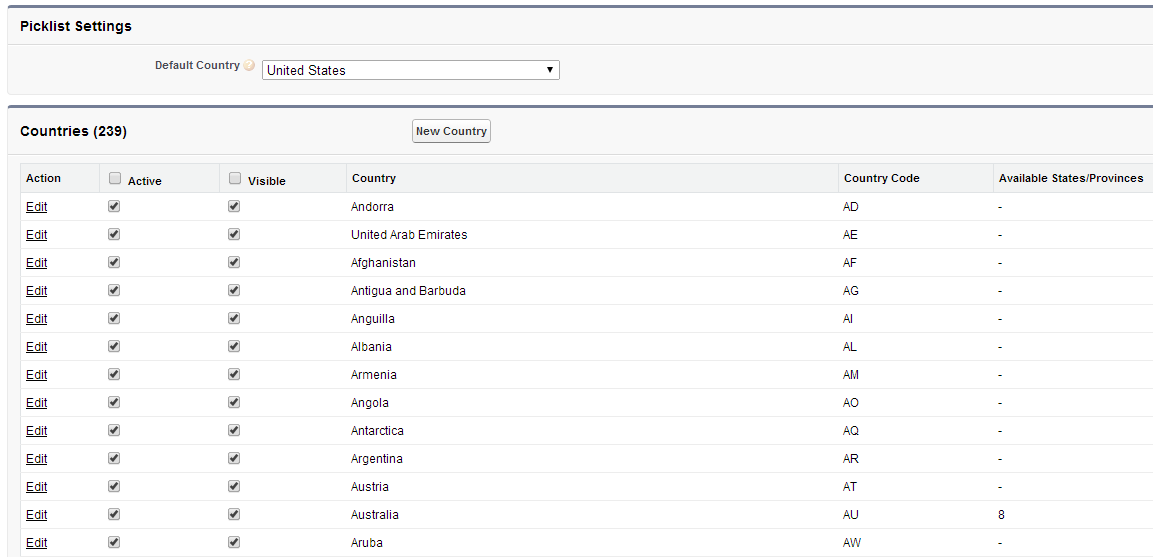
First, we need to determine which countries and states are going to display as picklist values. Start by clicking the Configure state and countries link in step 1. This step allows you to select a default country (particularly helpful if the majority of your users are in a single country) and indicate which countries and states should be available to your users.
The country list is fully customizable. Each column header indicates a specific action or permission for that particular country and related states. Click Edit to change the provided name, or to add/remove state values. The Active checkbox allows the field value to be accessed via the Metadata API but not visible to users. Visibility is granted via the Visible checkbox.
Salesforce provides access to 239 countries which are the ISO-3166 standard. Several countries will also come pre-populated with their related states. You can make any edits and adjustments you need to to match your business process.
Scan Your Organization & Convert Address Data
This scan is a discovery process which shows where the standard state and country fields are being used. After scanning your org, Salesforce will send you two emails, the first of which we will cover here.
The first email report will show you the address data from your current records which needs to be updated to match your new state and country values. The screenshot below provides a visual representation of the mapping that needs to be done on this page. United States was listed in my Salesforce org as UNITED STATES; US and USA. I used this tool to map all three variations to the new country value of United States.
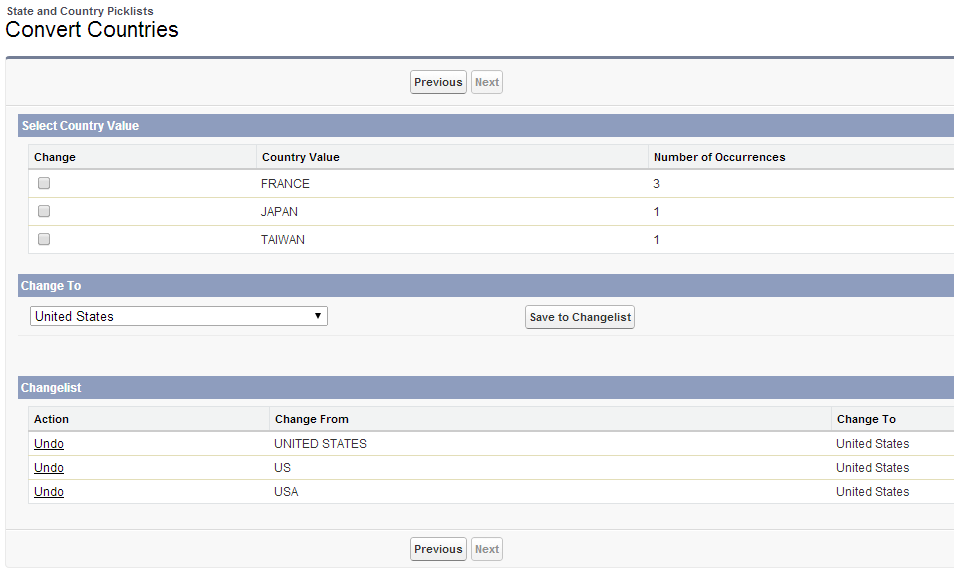
Map each of the field countries Salesforce has presented, and click Next. On the next page, you will be taken to a similar page where you can map your state values. This process may take some time so be patient to ensure proper mapping.
[highlight] NOTE: [/highlight] If you are unsure of the mapping for a particular country value, select Unknown Value for the mapped country. This will allow you to proceed with the mapping, and after implementation, present the user with an error message and request the data to be updated when the record is edited.
Now that the state and countries are mapped, review the mapping to ensure that it is correct. If you are not ready to enable the picklists, click Finish to save the mappings. Once the mappings are confirmed, you cannot undo them.
The second email you received as part of the org scan will show you where the standard state and country fields are being used currently, and will need to be updated as part of the changes. Let's take a deeper look below.
Enable State & Country Picklists & Update System
Now that all of your data has been converted, review the customization report sent to you via email as part of the organization scan. Here is an example of the report.
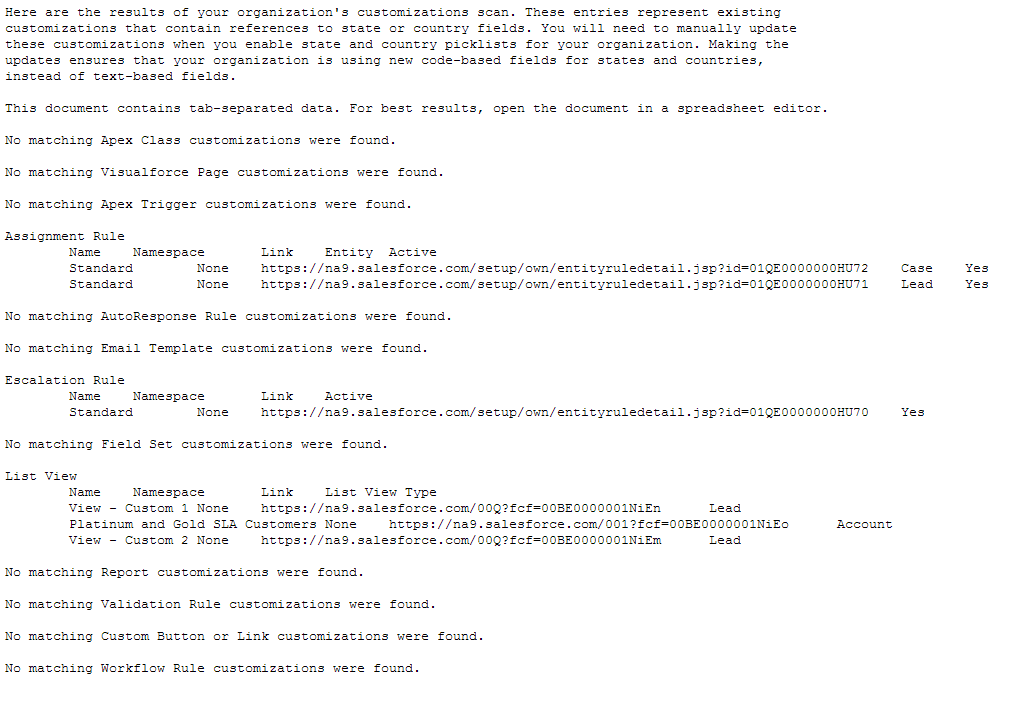
Salesforce recommends that these changes are done after activating the picklists. Just remember that once activating the functionality, you will want to quickly make the updates to your configuration as workflows, reports etc. may not work until they are updated. Depending on the results of this report, you may need to enlist some help to get the configurations updated. Be sure to also communicate to users that some functionality may not work until updates are made.
Once you are ready to enable the picklists, proceed to to the State and Country Picklist section of Setup, and click Enable in step 4. Don't forget to rescan your organization until all changes have been made and all functionality is fully operational.
That's it! You have now converted your standard text address fields to picklists! Congratulations!
Photo Credit: Nicolas Raymond via Flickr


